

Hello ladies, welcome to our gorgeous Bella Bow Tutorial featured in this months June Bow Box.
We knew it would be a slightly trickier bow to make so we knew this tutorial would come in handy for you to refer back to whenever you need to.

The exclusive Bella Bow is a 4-in-1 shape. One side can be used with Double sided fabric and one side without, there is 2 styles already for you. Then without the tails its a proper butterfly shape with the antennas on its own and then you can add the antennas to the main bow to create another butterfly shape.. So this shape is very versatile. The antennas where an optional extra.
The template you will have received inside the June Box will only have 1 wing, 1 pair of antennas, 1 tail and 1 center piece. The reason you only received one wing is because the other side of the butterfly is the same shape only flipped over on itself.
To make the Bella bow correctly you will need to cut out 2 wings one on one side and then flip the template over horizontally and cut it out the other side.
You will need
The exclusive Bella template
Hot Glue gun
Material of your choice
Fabric Scissors
Here's our step by step guide on how to achieve the shape..
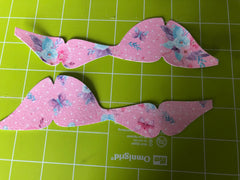
1. Take your Bella template and draw around the template onto your chosen material. We are using the fine glitter sheets featured also in this months Bow Box. Take your scissors and cut out your shape as so..

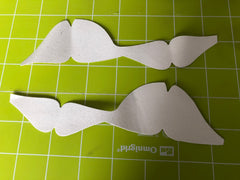
2. Next flip over your Bella template horizontally and once again draw around your template and then cut our your shape. You should now have 2 wing pieces of fabric that will look like this.
3. Next grab your hot glue gun and place a spot of glue in the center of your Bella wing as shown below and fold over the right side into the middle of the shape as shown here.


4. Next Repeat this on the opposite side of the bow shape bringing the left side into the middle and glue again to secure.

5. Repeat these steps on your second opposite wing that you had cut out as shown.


6. Now you have secured your 2 wing shapes, you will now need to stack them. To do this you will need to position one diagonally on top of the other, so they are angled away from each other creating the butterfly shape. When you have worked out how to angle them, glue a spot in the middle of the bottom one as shown and then position the top wing diagonally across opposite from the other wing.


7. Your Bella Bow should now already resemble a butterfly shape, at this point you could just add your antennae and create a butterfly bow or you can continue with this tutorial using the tails provided. Add a glue spot to the reverse of your butterfly shape and position your tails centrally onto the back of the Bella Bow.


8. Now add your center by adding a small spot of glue to the middle of your center strip on the reverse and wrap your center strip around the Bella Bow.
Here you have your Bella Bow- at this point antennas are optional to achieve the look you like.


Here's some we have created.
The bow can also be used on the opposite sides with double sided fabric as shown here.

Leave a comment